Perfect Juicy Chicken Breasts: No More Dry Meals for Salads & Sandwiches
Boneless, skinless chicken breasts are a true kitchen workhorse. Lean, healthy, and incredibly versatile, they’re a staple for countless meals, especially when you’re looking to add protein to vibrant salads or hearty sandwiches. Yet, despite their popularity, they often come with a reputation for being dry, rubbery, and utterly bland. If you’ve ever experienced the disappointment of a meticulously prepared salad ruined by tough chicken, or a sandwich lacking that tender, succulent bite, you’re not alone. The good news is that cooking perfectly juicy and tender chicken breasts for salads and sandwiches is not a culinary mystery reserved for professional chefs. It's actually a straightforward process that, with the right techniques and a few simple tools, can transform your everyday meals from mediocre to magnificent. Say goodbye to chalky, overcooked chicken, and prepare to elevate your culinary game!
The Quest for Perfectly Juicy Chicken Breasts: Why It Matters
Why do chicken breasts so often turn out dry? The primary culprit is their uneven thickness and low-fat content. The thicker part of the breast takes longer to cook, meaning by the time it reaches a safe internal temperature, the thinner edges are often severely overcooked and dehydrated. This leads to that dreaded chewy texture that no amount of dressing or sauce can truly fix. But when cooked correctly, boneless, skinless chicken breasts are not only a delicious source of lean protein, but they also act as a fantastic canvas for a myriad of flavors, making them ideal for everything from a light Caesar salad to a robust club sandwich. Mastering this skill means you’ll always have perfectly cooked chicken ready for quick meal prep, healthy lunches, or impromptu dinners. The secret lies in a few key steps that ensure even cooking and lock in moisture, delivering a consistently tender and juicy result every single time. For more in-depth knowledge on achieving consistent results, explore
The Secret to Tender, Juicy Chicken Breasts Every Time.
The Foundation: Essential Tools and Ingredients for Success
Before you even think about turning on the stove, gathering the right equipment and fresh ingredients sets the stage for success. You don't need a gourmet kitchen, just a few essentials:
- Boneless, Skinless Chicken Breasts: The star of our show. Sizes can vary significantly, so choose pieces that are relatively uniform, or be prepared to adjust cooking times. Always start with completely defrosted chicken breasts. Trying to cook from frozen will lead to uneven cooking, with the outside browning (or burning) long before the inside is safely cooked through.
- Cling Wrap or Gallon Plastic Bag: This is crucial for the tenderizing and evening-out process. Using plastic wrap or a resealable bag keeps the mess contained and provides a hygienic barrier between your chicken and your mallet.
- Meat Mallet or Heavy Pan: A meat mallet is ideal for pounding, but if you don't have one, a heavy-bottomed skillet, a rolling pin, or even a sturdy wine bottle can do the trick.
- Your Favorite Spices: While a simple sprinkle of salt and freshly ground black pepper can surprisingly elevate the natural flavor of the chicken, don't hesitate to get creative! Think Italian seasoning for Mediterranean salads, taco seasoning for a Southwest-inspired wrap, smoked paprika for a touch of warmth, or a simple blend of garlic powder, onion powder, and dried herbs for an all-purpose seasoning.
- High-Heat Cooking Oil: A neutral oil like avocado oil, grapeseed oil, or canola oil is best for searing, as they can withstand medium-high heat without smoking or breaking down.
- A Reliable Pan: A heavy-bottomed skillet, preferably cast iron or stainless steel, ensures even heat distribution and excellent searing.
- Optional: Marinade Ingredients: If you plan to marinate, have your chosen ingredients ready – citrus juice, olive oil, herbs, garlic, yogurt, etc.
Mastering the Method: Step-by-Step Guide to Juicy Chicken Breasts
The process for achieving tender, moist chicken breasts on the stovetop is surprisingly simple, yet incredibly effective. Follow these steps for culinary perfection:
1. The Pounding Perfection: Your Secret Weapon
This is perhaps the single most important step for achieving truly juicy chicken breasts. As mentioned, chicken breasts are naturally thicker on one side. Pounding them to an even thickness solves this problem by ensuring every part of the meat cooks at the same rate. This not only prevents overcooked, dry edges but also helps to tenderize the meat.
Place a single chicken breast on a cutting board, then cover it with a layer of cling wrap or enclose it in a gallon plastic bag (leaving a small opening for air to escape). Using your meat mallet or heavy pan, start by gently striking the thickest part of the breast. Work your way outwards, using consistent, firm (but not overly aggressive) strokes until the entire breast is about ¾ to 1 inch thick. Aim for uniformity – you want it to be roughly the same thickness from edge to edge.
2. Flavor Infusion: Seasoning & Marinating Strategies
Once your chicken breasts are pounded, it's time to infuse them with flavor. This step is crucial, whether you opt for a simple seasoning blend or a more complex marinade.
If you're not marinating, generously season both sides of your chicken with salt and pepper. Don't be shy with the salt – it helps draw out moisture and creates a flavorful crust. Then, add your chosen spices. For a Mexican salad, try chili powder, cumin, and oregano. For an Italian hero sandwich, rosemary, thyme, and a hint of garlic powder would be perfect. Allow the seasoned chicken to sit at room temperature for 10-15 minutes before cooking; this allows the salt to penetrate and helps with even cooking.
If you choose to marinate, place the pounded chicken in your marinade for at least 30 minutes, or up to 2-4 hours in the refrigerator. Marinades, typically acidic or enzyme-based (like citrus, vinegar, or yogurt), tenderize the meat and impart deep flavor. Just be careful not to over-marinate with highly acidic ingredients, as this can sometimes make the chicken mushy.
3. The Sizzle and Sear: Cooking on the Stove
Now for the main event! Heat your heavy-bottomed skillet over medium-high heat. You want the pan to be hot enough to create a good sear without burning the oil. Add a tablespoon or two of high-heat cooking oil to the pan and let it shimmer. You should see light wisps of smoke, indicating it's ready.
Carefully place the seasoned chicken breasts into the hot pan. You should hear a satisfying sizzle immediately. Don't overcrowd the pan; cook in batches if necessary to maintain pan temperature and ensure a good sear. Let the chicken cook undisturbed for 5-8 minutes on the first side, or until it develops a beautiful golden-brown crust. This browning contributes immensely to the flavor.
Flip the chicken and continue to cook on the second side for another 5-8 minutes, or until the internal temperature reaches 160-165°F (71-74°C) when measured with an instant-read thermometer at the thickest part. If the chicken starts to brown too quickly, reduce the heat slightly.
4. The Essential Rest: Locking in Juices
Once cooked, immediately remove the chicken from the pan and transfer it to a plate or cutting board. Crucially, let it rest for at least 5-10 minutes before slicing. This resting period allows the muscle fibers to relax and reabsorb the juices that have migrated to the center during cooking. Skipping this step will result in those precious juices running out onto your board, leaving you with drier chicken.
Beyond the Stove: Alternative Cooking Methods for Perfection
While the stovetop method is fantastic for a quick, flavorful sear, other techniques also yield delicious results, especially if you're cooking for a crowd or prefer a hands-off approach.
*
Baking: For a more gentle cook, bake your pounded chicken breasts at 400°F (200°C) for 18-22 minutes, depending on thickness, flipping halfway. Covering the baking dish loosely with foil for part of the cooking can help retain moisture.
*
Grilling: Achieve those coveted char marks and smoky flavor by grilling your pounded chicken breasts over medium-high heat for 4-6 minutes per side, until cooked through. Basting with a light sauce or marinade during grilling adds extra moisture and flavor.
No matter the method, remember that an internal temperature of 165°F (74°C) is the goal for food safety and optimal juiciness. For more quick and easy cooking ideas, check out
Quick & Easy Stove-Top Chicken Breasts for Salads & Sandwiches.
Maximizing Flavor & Freshness: Tips for Salads & Sandwiches
Once your perfectly cooked chicken breasts have rested, it's time to prepare them for their starring role.
*
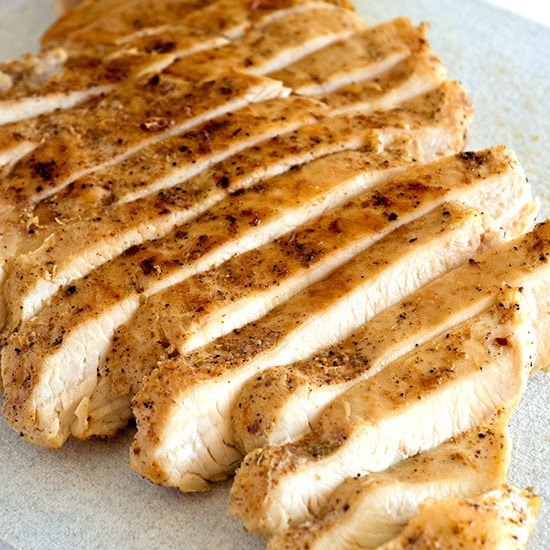
Slicing: Always slice chicken against the grain. This shortens the muscle fibers, making each bite even more tender and pleasant to chew. For salads, slice into strips or dice into cubes. For sandwiches, thin slices work best.
*
Cooling: If you're using the chicken cold for salads or sandwiches, allow it to cool completely before storing. This prevents condensation buildup, which can lead to soggy chicken.
*
Storage: Store cooked chicken breasts in an airtight container in the refrigerator for up to 3-4 days. This makes them ideal for meal prep, ensuring you have healthy protein on hand throughout the week.
*
Flavor Boosts: Toss warm chicken with a vinaigrette or a squeeze of fresh lemon juice immediately after slicing to enhance its flavor and keep it moist.
With these simple, actionable techniques, you'll never have to endure dry, flavorless chicken again. Instead, you'll be consistently creating tender, juicy chicken breasts that elevate your salads and sandwiches, making every meal a satisfying and delicious experience. Get ready to transform your kitchen and your plate!